In a previous article we covered how to accept and validate webhook data using Wishbone. In this article we will take things a step further by processing Pagerduty webhook events and convert them into Nagios external commands.
Our goal
Pagerduty is a platform for Enterprise-grade incident management that helps orchestrate the ideal response to create better customer, employee, and business value.
In this article we construct a Wishbone bootstrap file to run an event pipeline server specifically tailored to convert Pagerduty acknowledgment events into the corresponding Nagios external commands.
The result is that whenever an incident is acknowledged in Pagerduty, the corresponding Nagios host or service alert will also become acknowledged without any user interaction.
Prepare connectivity
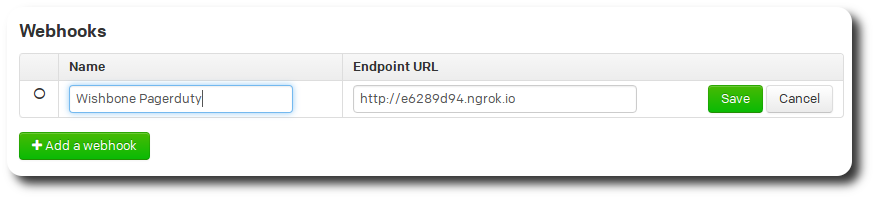
To receive webhooks from Pagerduty, Wishbone has to be accessible from the internet. How to achieve that depends on your specific environment and is beyond the scope of this article.
However, to test Wishbone from the comfort of your laptop you might consider using Ngrok to expose wishbone.input.httpserver to the internet without much hassle1:
$ ngrok http 19283
Enable Pagerduty webhooks
Pagerduty webhooks are tied to services.
That means every state change of an incident which came into Pagerduty through that service will cause a webhook event to be submitted to the defined webhook URL, which in our case will be the Wishbone server.
Install Wishbone
You can install Wishbone by following the instruction here or by downloading the Docker image 2
$ docker pull smetj/wishbone:2.1.0
Use Wishbone
List available modules
You can find a list of all available modules by invoking:
$ wishbone list
Get module help
If you need help about a module to see the parameters it accepts you can execute:
$ wishbone show --module wishbone.input.httpserver
Bootstrap
$ wishbone debug --config bootstrap.yaml
Starts the server in foreground printing all log messages to STDOUT. To stop the server you can just press CTRL+C.
$ docker run -i --volume $(pwd)/boostrap.yaml:/tmp/bootstrap.yaml smetj/wishbone:2.1.0 --config /tmp/bootstrap.yaml
If you're using the Wishbone Docker container you will have to mount the bootstrap file into the container3
Bootstrap file
The bootstrap file is Wishbone's configuration.
It defines the pipeline of stages through which the events flow and change from input to output:
Accepting JSON over HTTP
To accept the Pagerduty webhook data we use wishbone.input.httpserver and assign the instance name webservice (line 4) to it.
The webservice.outbox queue is then connected to decode.inbox (line 68) of the wishbone.decode.json module instance (line 8) which converts the JSON data structure into a Python data structure. Besides translating the JSON string into a workable Python datastructure, it also ensures the received data is valid JSON.
Pagerduty packs multiple events into the messages array. Since each event type needs to be treated individually, we extract each entry and create a new event out of it using wishbone.function.deserialize prior to sending each event to the next module (line 70) for further processing.
Pattern Matching and event routing
Each Pagerduty event type has to be converted to the corresponding Nagios external command. Therefor we need to route the event to right Nagios conversion module depending on the event type. Using the wishbone.flow.jq module we can perform pattern matching and event routing based on jq expressions
Depending on the event type (line 23, 27) the message is forwarded to the corresponding queue (line 25, 29). Events which do not match any of the rules are simply dropped. 4
Using this construction all service acknowledgments are forwarded to one module (line 68) whilst host acknowledgments are send to another module (line 71) for further processing. 5
Constructing the Nagios command
Now the acknowledgment events are filtered out and split into a host and service acknowledgment stream we construct the corresponding Nagios external commands using a dedicated module for each (line 31, 40).
The Nagios external commands for host and service acknowledgments have following format:
[1455750664] ACKNOWLEDGE_HOST_PROBLEM;<host_name>;<sticky>;<notify>;<persistent>;<author>;<comment>
[1455750664] ACKNOWLEDGE_SVC_PROBLEM;<host_name>;<service_description>;<sticky>;<notify>;<persistent>;<author>;<comment>
The wishbone.function.modify module offers many ways to manipulate the content of the event.
In case of a service event we're extracting both the hostname and servicename out of the incident_key field (line 36) using the extract command6. The resulting dict containing the extracted key/values is then merged into @data.
The next modification (line 37, 45) constructs the epoch timestamp the Nagios external command require. This is managed by the time command which converts the event's timestamp into the desired format and stores the result into a field of choice which is @data.epoch in this case.
The last modification (line 38, 46) handles the construction of the actual data we're going to submit to Nagios itself. The template command accepts a template and a dictionary to complete the references in the template7 storing the result into a field of choice which is @tmp.nagios.message in the above example.
At this point the raw Wishbone event traveling from module to module meanwhile has following format:
{
  "@data": {
    "created_on": "2016-01-27T16:54:54Z",
    "data": {
 ...snip...
        "incident_key": "server-123.mycompany.local/Swap Usage",
        "incident_number": 196361,
 ...snip...
    },
    "epoch": "1455835767",
    "hostname": "server-123.mycompany.local",
    "id": "b31a3090-c516-12f5-86f9-22000bffca53",
    "servicename": "Swap Usage",
    "type": "incident.acknowledge"
  },
  "@errors": {},
  "@timestamp": 1455835767.454769,
  "@tmp": {
    "deserialize": {
      "generated_by": true
    },
    "nagios": {
      "message": "[1455835767] ACKNOWLEDGE_SVC_PROBLEM;server-123.mycompany.local;Swap Usage;2;1;1;John Doe;Acknowledged by Wishbone"
    }
  },
  "@version": 1
}
Submitting the Nagios data
Now we have constructed the desired data we have to submit it to its final destination.
Assuming the Nagios named pipe is made available over TCP we use wishbone.output.tcp (line 58) to submit the data to it whilst referring to @tmp.nagios.message (line 64) which contains the relevant data.
Connecting queue output_funnel.outbox to queue output_screen.inbox instead prints the Nagios external command to STDOUT, which can be practical to inspect whether the desired result is achieved.
Final words
In this article we demonstrated how Wishbone can be used to construct a middleware for Pagerduty and Nagios by setting up a sync between two otherwise disconnected applications.
Obviously, Wishbone is not limited to Pagerduty and Nagios but can be used to build a bridge between many other systems. We also have not touched any advanced topics such as failover, buffer and retry constructions in case of failure.
The article only covered a small subset of the Pagerduty events though it should provide enough information on how to proceed extending the bootstrap file to process other types.
If you find Wishbone useful, have questions of any kind or need my help implementing a Wishbone server, feel free to get in touch or to add your comments.
Footnotes:
- The wishbone.input.httpserver module listens by default on port tcp/19283 ↩
- If you encounter any problems installing Wishbone drop me a line so I can help you out and improve the installation procedure. ↩
- Once you have a bootstrap file which suits your needs you can add it to the container itself. ↩
- You can connect the no_match queue to another module if you wish to treat non matching events differently. See docs of wishbone.flow.jq module for more information. ↩
- In my setup the Pagerduty service key can be either <hostname> in case of a host alert or <hostname/servicedescription> in case of a service alert, hence the jq expression validating the content for a "/". (line 24, 28) ↩
- The extract command makes use of named groups from Python's re module. See https://docs.python.org/2/library/re.html ↩
- The Python Format Specification Mini-Language https://docs.python.org/2/library/string.html#format-specification-mini- language ↩